

Bike Maintenance Part 1: Learn How to Effortlessly Repair a Puncture With These 10 Steps
You’ve just booked yourself onto a Maximum Adventure cycle tour, maybe Hadrian’s Wall or London to Paris, and now it’s time to get bike fit.
An exercise bike is a great way to start your training program but sooner or later you have to get out there to face the hills. But before you head out on your bike, you’ll need to understand basic bike maintenance to become a self-sufficient and independent cyclist. And, we’re pleased to tell you, you’ve come to the right place. We’ve consulted with our team of professional, experienced, and qualified cycle guides to produce a series of articles focused on bike maintenance, with this first article focused on puncture repair.
Punctures happen to everyone sooner or later and many people have a problem with them. In this Maximum Adventure article, we aim to equip you with puncture repair know-how so that you are confident you can keep yourself rolling.
With that said, let’s get rolling! 🚲
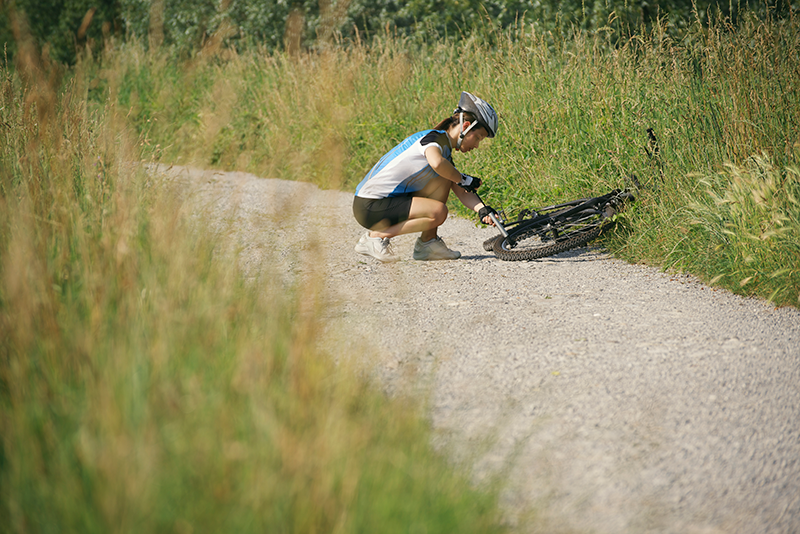
How to repair a puncture on a Maximum Adventure cycle tour
On Maximum Adventure guided tours our guides will help you with basic bike maintenance such as mending punctures.
Technically, during a ride, we do not actually mend a puncture because it would take too long. Instead, we change the inner tube which is inside the tyre (this keeps the tyre inflated). (Some bikes have tubeless tyres. In this case, the tyre itself is inflated meaning there’s literally no tube to inflate inside).
A tyre contains a sticky liquid that is designed to self-seal a puncture. However, sometimes the puncture is too big to self-seal and when this happens you have to put an inner tube in. Either way, you need to carry an inner tube and most people carry two. The other bit of kit you need is a set of 3 tyre levers, two for changing the tyre and one spare because sometimes they break.
Puncture repair basics
Before you can fix any puncture, you need to know what sized inner tube to use. For this, there are three important features to consider:
- Tyre size,
- Valve length,
- Type of pump.
Tyre size
On our longer tours – such as London to Paris or London to Brussels, we advise that you ride a road bike with a hybrid or racing style design. These are generally equipped with wheels that need 700C/622mm tyres of various widths from 18mm to around 32mm. It’s important to know what size your tyre is so that you have the correct spare inner tube. The size of the tyre is written on its side.
Valve length
The valve is where you fit your pump to blow the tyre up. It should poke out from the rim and is around 3cm in length. If the valve is too short it won’t poke through enough for you to get the pump on. So how do you know what length you need? Have a look at your wheel rims.
How thick (or deep) are they? Wheels with deep rims are called low-profile wheels. Unfortunately, the depth is often not printed on the wheels so make a note of the wheel brand or take a photo before buying your inner tube.
Type of pump
Take a look at your bike pump. This is usually fitted to the rear of your bike frame. It can take a minute to work out how to use them because they come in a variety of designs. The bit that fits onto the valve is either a Presta fitting or a Strada fitting. Roads bikes generally have the Presta type and mountain bikes the Strada type.
Carrying a puncture repair kit
A rear tool pouch is the best way to carry your puncture repair kit. You can also pop some other useful bits of kit in there such as a few wet wipes in a plastic bag, a cycle ‘multi-tool, and a pair of tweezers for pulling thorns out of your tyre (tape the ends so you don’t stab the inner tubes with them). Most bikes don’t need a spanner to take the wheels off, but obviously, if yours does then you need to carry the correct tool for this. If you have disc brakes you will need a card such as a plastic store card. We will explain why later.
Bike maintenance: Puncture repair in 10 steps
So it’s finally happened. That bumping, hard to pedal feeling means you have a flat tyre. Don’t panic! Find a safe place away from traffic and ascertain which wheel has the punctured tyre. If you’re lucky it’s the front. If you’re unlucky it’s the rear and you’re gonna need those wet wipes later.
Follow the steps given below, and you’ll soon be well on your way.
Fixing a puncture step #1: Take your wheel off
Taking off your rear wheel
Getting ready to remove the wheel
First change to your ‘hardest’ gear so the chain is on the smallest cog on the back. This is so you can get your wheel back on easily. Then, if you have brake blocks and not disc brakes there may be a little lever to open them wider for getting the wheel out.
If you have disc brakes you will need that plastic card. Look at where the disc fits into the actual brake. This is a thin slot. When the wheel is removed you mustn’t accidentally press your brake lever. This will close the slot and then it’s very, very difficult to open it again. To prevent this from happening, slip the card into the slot as soon as you have removed your wheel. You may have to make the card thicker to stop it from falling out.
It’s cool to be able to lean over the bike like a pro to take the wheel off. However, this is difficult, especially if you are not tall. It’s easier to turn your bike upside down.
- . Undo the wheel quick release or unscrew using the twist lever on the wheel. If you have the twist lever type, remove the axle and keep it safe.
- Stand behind the bike and pull the rear changer backward towards you, while, at the same time pulling up on the wheel to disengage it.
Taking off your front wheel
Removing your front wheel is easier than removing your rear wheel as you don’t have to wrestle with your chain. Other than that, the same principles apply. Follow the same process mentioned above for your rear wheel.
Fixing a puncture step #2: Prepare the tyre to remove the inner tube
First, check there isn’t something sharp sticking out of the tyre, and make sure the tyre is completely deflated.
Next pinch the tyre between your thumb and fingers all around the tyre. This moves the inner edges of the tyre (the beads) deep into the rim so that it’s less tight to pull off.
Fixing a puncture step #3a: Take the tyre off the rim
Get one side of the tyre off the rim. Locate where the valve is. You need to start levering the tyre off on the opposite side of the tyre’s valve. Insert a tyre lever hook side down. Do not start to slide the lever. Instead, insert the second lever into the tyre to a depth that’s about hand’s width away. Then start to slide the lever around the rim to bring the bead (the edge of the tyre that sits inside the wheel) out of the rim. If the lever won’t slide easily, pinch around the tyre again (like before) to loosen it. You only need to lever off one side of the tyre.
Fixing a puncture step #3b: Remove the inner tube
Remove the inner tube by first unscrewing the lock ring (the threaded washer around the value) and then pushing the valve through. Then pull the rest of the tube out.
Fixing a puncture step #4: Find out why you have a puncture
Find out why you had the puncture. This is important because if it was caused by a sharp object this could still be in the tyre and would cause the tyre to puncture again as soon as you start riding. Run your fingers carefully around the inside of the tyre. If you find anything, such as a thorn or a piece of glass pull it out from the outside of the tyre. If you can’t find anything, try blowing up the punctured tube and listen for where the puncture is. Then, work out where the tyre hole is and take a closer look. If you still can’t find anything it could be that you just ran over something that didn’t stick in, that you had a pinch-type puncture from riding over a pothole, or even the inner tube itself has a leaky valve.
Fixing a puncture step #5: Insert your spare inner tube

Insert your spare inner tube. This is fiddly. Firstly insert the valve, then put the wheel on the floor for stability. Next, push the tube into the tyre with your hands simultaneously from both sides of the valve. You want it so that the inner tube is inside of the wheel, and on the one side, the tyre is back in place.
Fixing a puncture step #6: Get the tyre back on your wheel
Now for the hard part. Getting the tyre completely back on. Use your thumbs, and push the bead inside the rim with the thumbs of both hands simultaneously. This is easy at first but then gets harder and harder. Eventually, you usually get to a point where it’s too hard to push the tyre on with your bare hands. This is where you need your levers again.
Kneel and insert one lever and keep your thumb over it. Insert the other lever away from you, and, being careful not to trap the inner tube which may try to poke out, lever the rest of the tyre on, working back towards your first lever. If this is tight, pinch the tyre with your hand all-around as you did before. This helps to seat the tyre deeper into the rim and loosens the bead.
Fixing a puncture step #7: Pump up your new tyre
Pump up the tyre with your hand pump. It’s very difficult to overinflate a tyre with a hand pump. If using a track pump with a pressure gauge, inflate to the pressure written on the side of the tyre.
Fixing a puncture step #8: Final checks
Check the tyre is on properly. There’s a line guide on the side of the tyre around half a cm thick. You should be able to see this all the way around. Spin the wheel. There should be no wobble or bulges. If there are, deflate the tyre and pinch it all round again because the inner tube could be trapped. If there is still a bulge when you pump it back up, this could be because the tyre is damaged and should not be ridden on.
Fixing a puncture step #9: Put your wheel back on your bike
Stand behind the bike. (Take out the card from your disc brake if you have disc brakes, and guide the disc into the slot as you put the wheel on).
If you have brake blocks but no way of widening the gap between the brake blocks such as a lever, you may have to deflate your tyre to get it to fit past the brake blocks.
For the back wheel, put the chain around the smallest cog and insert the wheel by pulling the rear changer towards you. Turn the wheel with your hand to make sure it’s not catching on anything, then tighten it up using the quick release lever or insert and tighten the twist lever through-axle.
Fixing a puncture step #10: Get on your bike
Turn your bike over, and repack your tools and the punctured tube – this can be repaired and reused.
Get on your bike, and away you go!
If you want to see these 10 steps in action, watch this video by bike expert and cyclist enthusiast David Arthur.
Ready for your next cycle challenge? Book your cycle tour with Maximum Adventure
We hope you’ve found our 10-step puncture repair guide useful, as we want you to be confident riders, who can impress others with your knowledge of bike maintenance.
When you book your guided cycle tour with Maximum Adventure, our team of professional, qualified, and experience cycle guides are wizards at puncture repair and will be more than happy to explain the above process to you.
Ready to take cycling to the next level of adventure? Book onto Maximum Adventure’s guided cycle tours, and make memories that will last a lifetime.
- Coast to Coast Cycle
- Hadrian’s Wall Cycle-Walk-Cycle
- LEJOG (Land’s End to John O’Groats)
- London to Amsterdam Cycle
- London to Brussels Cycle
- London to Paris Cycle
- Paris to Geneva Cycle
- River Rhine Cycle – Mainz to Cologne
- River Danube Cycle – Vienna to Budapest
- River Rhone Cycle – Furka Pass to Geneva
Interested in a cycling trip but not quite sure which to choose? Please get in touch as we’d love to hear from you!


